

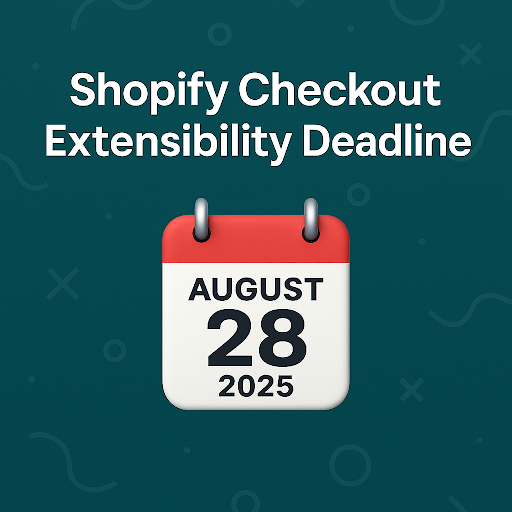
Shopify’s next major Checkout Extensibility milestone is approaching fast. On August 28, 2025, Shopify will begin shutting down additional scripts, apps with script tags, and checkout.liquid on the Thank you and Order status pages completely.
You may have started this process back in 2024 when the update was first announced, but if you’re not fully migrated off of deprecated features before August 28th, your store may be in trouble.
This guide will walk you through exactly what to do, how to do it, and what tools are available to make it easier.
The Fix: What You Need to Do (Step-by-Step)
1. Access your Shopify Checkout Customizations Report
First go to: https://admin.shopify.com/store/YOUR–STORE–NAME/settings/checkout/customizations–report
(replace YOUR-STORE-NAME with your store’s unique identifier).
If you still need to upgrade, you will see a summary of modifications to migrate.
Otherwise, you will see a screen that confirms you have finished the migration successfully.

2. Make a complete list of checkout customizations
We don’t recommend relying on the Customizations Report, it’s a good starting point but it misses things.
Start by manually reviewing everything you’ve ever touched in checkout.liquid, the Additional Scripts field, and any apps that injected scripts via script tags.
We recommend using Digital Position’s spreadsheet template to do a full manual audit and ensure nothing gets lost
3. Rebuild everything using Shopify Checkout Extensibility tools (hardest part)
Conversion tracking should be migrated to a compatible app (if it exists) or manually using Shopify Pixels (Customer Events). (See next section for a complete breakdown.)
Visual or functional changes must be recreated using the Checkout Editor and compatible apps from the Shopify App Store.
(Some apps may need to be replaced entirely if they don’t support Checkout Extensibility.)
4. Migrate and disable legacy code
Once your new pixels and blocks are in place, disable your legacy setup.
Disconnect or comment out any old code in checkout.liquid and the Additional Scripts field to avoid conflicts, duplication, or degraded performance.
5. QA and measure performance
Validate all your key conversion events (purchases, form submissions, etc.).
Watch for double-firing tags, missing purchase events, or layout regressions.
Complete at least one full test order and check event logs using browser dev tools or tag manager previews.
Platform-Specific Instructions + Layout Migration Tips
Before you dive into migrating anything yourself, check if you’re using a managed conversion tracking platform like Elevar or Analyzify. If you are, migration should be mostly automatic but will require different steps.
GA4
- This Google & YouTube app is compatible with Checkout Extensibility and can install a full GA4 conversion tracking setup, including all standard ecommerce events. (Recommended)
- You can recreate full GA4 conversion tracking on Shopify manually using this Shopify Pixel GA4 conversion tracking template
Google Ads
- The same Google & YouTube app can also install Google Ads tracking, but we don’t recommend it because it automatically creates conversion actions for non-key events and bloats reporting.
- We recommend using our tracking template for Google Ads so you can have full control over what conversion actions are fired at what times.
Meta (Facebook)
- This Facebook & Instagram app is compatible with Checkout Extensibility and will install all standard ecommerce events & CAPI (Recommended).
- You can also choose to install manually using this Meta Ads template
Microsoft Ads
- This Microsoft Ads conversion tracking template shows how to set up a conversion to fire on the purchase event (some config required on the Microsoft Ads side)
TikTok
- Custom TikTok conversion tracking template with all basic ecommerce events
GTM
- Install GTM using Shopify Pixels across whole site
- Install GTM using Shopify Pixels (Only on checkout pages)
Note about GTM – Shopify Pixels run in a sandbox. GTM installed this way cannot manipulate the DOM or read page content. It’s only good for conversion tracking – no custom DOM-dependent tags or triggers. If you need to use GTM to modify on-page content, you should install the typical way in theme.liquid and only use GTM via Pixels on checkout pages.
Custom Script
- If you need to add a custom script, you will need to load it will javascript as
- This code will install a script on all pages of the site (in a sandbox)
- If you need to run a custom script only on the checkout pages you can use this script
Layout customizations – Any graphical or layout modifications done in checkout.liquid must now be rebuilt using apps and blocks in the Checkout Editor. This includes upsells, loyalty widgets, post purchase surveys, and custom thank you page content.
What Shopify Checkout Extensibility & Why Does It Matter?
What is Shopify Checkout Extensibility?
Shopify Checkout Extensibility is the new framework for customizing your Shopify checkout. Instead of editing checkout.liquid, everything now runs through Shopify’s hosted checkout UI, where you use blocks, app extensions, and pixels to inject custom functionality.
Why checkout.liquid, script tags, and Additional Scripts are being deprecated:
Shopify is phasing these out to improve checkout speed, reduce the risk of broken or insecure code, and maintain a consistent experience across stores.
Key dates:
August 13, 2024– checkout.liquid was locked for Info, Shipping, and Payment pagesJanuary 6, 2025– those pages stopped rendering legacy custom code- August 28, 2025 – Thank You and Order Status pages will stop rendering legacy customizations; Additional Scripts stop working
Conclusion
Here’s your 4-step survival plan one more time:
- Access your Shopify Checkout Customizations Report
- Audit your customizations
- Rebuild using Checkout Extensibility tools
- Turn off legacy code
- Test everything
This update isn’t optional, and it’s not easy. But with the right strategy, you can keep your conversion tracking intact and your checkout flowing without disruption.


%20Is%20Coming.%20Here’s%20How%20to%20Not%20Screw%20It%20Up)
no replies