


Edit 8/4/2025: We’ve just published a post with new updates & a revised plan to help you through this migration. Read the updated post.
If you missed the deadline on 8/13/24, read Shopify’s statement on the impact of missing the August 13, 2024 deadline.
A big change is coming to Shopify and you need to take action before 8/13/24 or you might be in trouble. Here is the documentation from them regarding the change. It’s a long, exhaustive read, but it doesn’t tell you WHAT to do or HOW to do it. By the end of this post, you should have:
- A quick and dirty TLDR about the change
- A plan to tackle the migration (using our Shopify Checkout extensibility migration spreadsheet)
- Conversion tracking code examples for all major platforms
I’ll start with the TLDR so you don’t have to look any further if this is all you came for
- 8/13/24 – Checkout.liquid is turned off for Info, Shipping & Payment pages
- 8/28/25 – Checkout.liquid is turned off for Thank you & Order status pages (Including Additional Scripts)
- You need to make a list of every script and plugin making modifications to your checkout.liquid (this will all be REMOVED after the deadline passes)
- You can find an auto-generated list of your current modifications to the standard checkout process at this link: https://admin.shopify.com/store/[YOUR–STORE–NAME]/settings/checkout/customizations–report
- Digital Position recommends doing this manually since the auto-generated list doesn’t always get everything (you can use this template)
- You will need to migrate the functionality of everything you want to keep to the new checkout experience using Shopify pixels, the new checkout builder tool, and checkout apps.
- IMPORTANT NOTE: It won’t be possible to migrate everything over. You might have to change your checkout flow.
- Digital Position’s created some free code examples for Shopify pixels
Shopify created a ‘Customizations report’ which can be accessed by following this link https://admin.shopify.com/store/YOUR–STORE–NAME/settings/checkout/customizations–report and replacing YOUR-STORE-NAME with, you guess it… your store’s name (can be grabbed from the url after logging in).
This report supposedly gives you the breakdown of all the modifications made to your store’s checkout process (includes checkout.liquid and the Additional Scripts section). However, there are a few problems with taking this at face value.
- It’s AI generated – doesn’t always make sense and doesn’t provide actionable insights
- Sometimes the dropdowns are just blank
- It doesn’t cover everything
While the effort by Shopify is appreciated, the fact that it doesn’t show you everything makes this tool near useless in my opinion.
You will need to go through checkout.liquid line by line, as well as Additional Scripts, (and anywhere else that might have made changes affecting checkout), and manually make a list of everything you find. The code here will 100% stop firing after those deadlines, so you’ll need to either migrate them to Checkout Extensibility or sacrifice the customized functionality.
We built a spreadsheet you can copy and use to keep track of everything. It has instructions built-in for many types of scripts you might want to migrate.
To simplify, there are 3 main types of scripts / modifications:
- Layout modifications – changes to the look and feel of the checkout process
- Custom scripts & 3rd party integrations – Upsells, custom thank you pages, live chat, etc.
- Conversion tracking – Google, Meta, Tiktok, Microsoft, etc.
You will need to take a different approach to migrate each type.
Subscribe to get monthly updates

Get access to our industry trends newsletter delivered to your inbox so you never miss a beat.
We will never spam you.
Layout Modifications
With Shopify’s Checkout Extensibility, you don’t have the ability to make changes directly to the code of your checkout, however there is now a Checkout editor.
You should be prepared to make some changes to your checkout flow when you upgrade. Unfortunately, not all modifications will be supported in Checkout Extensibility, so you must budget time to build your new checkout.
Custom scripts & 3rd party integrations
You can now install checkout specific apps from the App store. Most ecommerce stores will have lots of apps and scripts already that make modifications to checkout.liquid for things like shipping rates calculation, upsell modules, customer loyalty widgets, etc. Those app developers should be making Shopify Checkout Extensibility complaint updates to their apps before the deadlines.
If your checkout relies on specific apps to function, you should check that app’s website or documentation, and potentially reach out to their support for migration instructions. Even if an app developer releases an update to their app to support Shopify Checkout Extensibility, it won’t auto apply and will require action on your part to implement.
If you can’t find instructions to migrate the app and you can’t track down the developer, you might have to start looking for a new app and integrate that into your checkout flow.
Take this chance to simplify your checkout and remove any scripts that you no longer need.
Conversion Tracking
This guide will focus on the Conversion Tracking scripts. Conversion tracking is a complex topic, and most stores will have lots of different tracking installed through various methods.
This might be a good time for you to simplify your conversion tracking strategy as well. Shopify pixels aims to do just that, and is one of the few parts of this update that I’m actually excited about.
Warning: This part is very code heavy, and this guide is intended for experienced digital marketers, developers, or whoever this project was dumped on at the last minute, 5 days from the deadline… We got you.
To summarize Shopify pixels, it allows you to run code anywhere on your site. You specify the standard events you want to listen to, and execute conversion tracking codes within that block.
Most conversion tracking in Shopify is processed through the Additional Scripts section (usually with an if first_time_accessed). To achieve that same functionality using Shopify pixels, the code would look like this:
// This example shows how to install a custom script on only the main checkout pages
// Everything included here (outside analytics.subscribe) will run on every page load

analytics.subscribe("checkout_completed", (event) => {
  // Custom script to only fire when a purchase occurs (make sure to exclude HTML)
  // Whatever code is inside this block will fire only after a purchase has occurred
});
Pretty neat.
I’m about to share the code with you to install a complete conversion tracking solution for each major platform using pixels, but before you go down that road, let me encourage you to use Shopify apps to make your life easier. Lots of apps already exist to install GA4, Google Ads, Facebook, etc. (including checkout events and purchase conversions).
I wouldn’t recommend manually writing conversion tracking scripts unless
- You are dealing with legacy code and need to preserve pre-existing functionality
- You have highly custom conversion tracking needs
WIth that out of the way, here is the code:
- Add a custom script to all pages with Shopify Pixels
- Add a custom script to checkout pages with Shopify Pixels
- Google Ads conversion tracking with Shopify Pixels
- Google Analytics (GA4) conversion tracking with Shopify Pixels
- Google Tag Manager (GTM) with Data Layer using Shopify Pixels
- Meta (Facebook) Ads conversion tracking with Shopify Pixels
- Microsoft Ads conversion tracking with Shopify Pixels
Note about GTM
GTM installed within Shopify pixels will not function the same as one installed using theme.liquid. This is because Shopify pixels run in a sandbox environment. Scripts that run in Shopify pixels cannot modify or scrape content from your website and can only be used for conversion tracking.
If you currently have GTM installed on your site and would like to make sure that your checkout related tags continue to fire, you can use this version to install GTM ONLY on checkout pages.
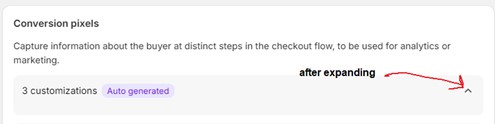
How to install Shopify pixels
So how do you actually use the code? Go to Settings > Customer events to see the Shopify pixels interface. (If the option is grayed out you will need to be granted access)
From here you can manage your pixels and create new ones. Pixels created by Apps will also appear here.
After creating a pixel, you can connect / disconnect it to enable or disable it.
Note that if you make a change to the code of a pixel, you will need to disconnect and reconnect before the changes take effect.
One tricky part with Shopify pixels is that they only support pure javascript. Lots of conversion tracking platforms have HTML tags in their standard pixel code. That’s no problem though as you can still achieve the same functionality in JavaScript. Take a standard gtag base pixel for example:
<!-- Global site tag (gtag.js) - Google Ads: AW-EXAMPLE →
<script async="" src="https://www.googletagmanager.com/gtag/js?id=AW-EXAMPLE"></script>
<script>
  window.dataLayer = window.dataLayer || [];
  function gtag(){dataLayer.push(arguments);}
  gtag('js', new Date());

  gtag('config', 'AW-EXAMPLE');
</script>
In Shopify pixels you would write:
const script = document.createElement("script");
script.setAttribute("src", "https://www.googletagmanager.com/gtag/js?id=AW-EXAMPLE");
script.setAttribute("async", "");
document.head.appendChild(script);

window.dataLayer = window.dataLayer || [];
function gtag() {
  dataLayer.push(arguments);
}

gtag("js", new Date());
gtag("config", "AW-EXAMPLE");
This works, but is absolutely a pain to rewrite all of your conversion tracking if it’s already set up and working. Thankfully our code examples have done most of the heavy lifting, and you are free to use and modify to suit your needs. ChatGPT is always available too and is pretty good at transposing code from one language to another.
We’ve just barely scratched the surface, but hopefully this gives you a starting point. Please mark your calendar for 8/13/24 and don’t wait until the last minute.
I won’t pretend like it’s a simple thing to migrate to Shopify’s Checkout Extensibility, for a digital marketing agency like us, big sweeping changes to platforms like this is nightmare fuel.
We developed the spreadsheet and code examples in this guide to help our clients migrate to Shopify’s Checkout Extensibility, and if you feel like you’re in over your head and don’t know what to do next, we can do the same for you!
Don’t hesitate to reach out if you have any questions or would be interested in having professional support.

Just wanted to say “THANK YOU” for providing the meta pixel code. I have no coding experience and trying to do my best to stay on top of things. Being out of work to take care of a family member means budget is tight. So I am VERY APPRECIATIVE that you explained the migration and provided an easy way to incorporate the code. I did not have custom changes (except for the meta pixel HTML code that I previously inputted myself) so not much to migrate over (but scary nonetheless). THANK YOU! It was generous and kind of you to help us out. May it be returned to you 1,000 fold!
Very nice information. Thanks for sharing this wonderful tutorial here with us. It is quite important to understand the shopify before dealing with it. Keep up the good work.